环境配置
1
2
3
4
5
6
7
8
|
go install github.com/zeromicro/go-zero/tools/goctl@latest
goctl api new greet
cd greet && go mod tidy && go run greet.go -f etc/greet-api.yaml
|
在浏览器中打开
http://localhost:8888/from/world,即可看到响应
项目创建
从零开始
1
2
3
4
5
6
7
|
goctl api new myservice
cd myservice && go mod tidy
goctl rpc new myservice
cd myservice && go mod tidy
|
已有文件生成
若已有.api或.proto文件
1
2
3
4
5
6
7
8
9
10
11
12
13
14
|
mkdir myservice && cd myservice
go mod init myservice
goctl api go -api myservice.api -dir .
go mod tidy
mkdir myservice && cd myservice
go mod init myservice
goctl rpc protoc myservice.proto \
--go_out=./pb \
--go-grpc_out=./pb \
--zrpc_out=.
go mod tidy
|
重新生成已有文件
修改文件后重新生成而不覆盖业务逻辑:
1
2
3
4
5
6
7
8
|
goctl api go -api myservice.api -dir .
goctl rpc protoc myservice.proto \
--go_out=./pb \
--go-grpc_out=./pb \
--zrpc_out=.
|
API服务
以一个用户服务为例
编写API DSL
1
2
3
4
5
6
7
8
9
10
11
12
13
14
15
16
17
18
19
20
21
22
23
24
25
26
27
28
29
30
| syntax = "v1"
type (
LoginReq {
Username string `json:"username"`
Password string `json:"password"`
}
LoginResp {
Token string `json:"token"`
}
UserInfoReq {
Id int64 `path:"id"`
}
UserInfoResp {
Id int64 `json:"id"`
Username string `json:"username"`
Email string `json:"email"`
}
)
service user-api {
@handler Login
post /user/login (LoginReq) returns (LoginResp)
@handler GetUserInfo
get /user/:id (UserInfoReq) returns (UserInfoResp)
}
|
生成服务
使用命令生成服务:
1
2
3
| goctl api go -api user.api -dir .
go mod init user-api
go mod tidy
|
生成的结构如下:
1
2
3
4
5
6
7
8
9
10
11
12
13
14
15
| user-api/
├── etc/
│ └── user-api.yaml
├── internal/
│ ├── config/config.go
│ ├── handler/
│ │ ├── loginhandler.go # 自动生成,不要编辑
│ │ ├── getuserinfohandler.go # 自动生成,不要编辑
│ │ └── routes.go
│ ├── logic/
│ │ ├── loginlogic.go # ← 在这里实现
│ │ └── getuserinfologic.go # ← 在这里实现
│ ├── svc/servicecontext.go
│ └── types/types.go # 从 DSL 自动生成
└── user.go
|
若在DSL变更后重新申城,直接调用goctl api go -api user.api -dir .,goctl不会覆盖logic/文件
实现逻辑
在internal/logic中实现业务逻辑
编辑loginlogic.go
1
2
3
4
5
6
7
8
| func (l *LoginLogic) Login(req *types.LoginReq) (resp *types.LoginResp, err error) {
if req.Username == "admin" && req.Password == "123456" {
return &types.LoginResp{
Token: "mock-jwt-token-for-" + req.Username,
}, nil
}
return nil, errors.New("invalid username or password")
}
|
编辑getuserinfologic.go
1
2
3
4
5
6
7
| func (l *GetUserInfoLogic) GetUserInfo(req *types.UserInfoReq) (resp *types.UserInfoResp, err error) {
return &types.UserInfoResp{
Id: req.Id,
Username: "alice",
Email: "alice@example.com",
}, nil
}
|
运行测试
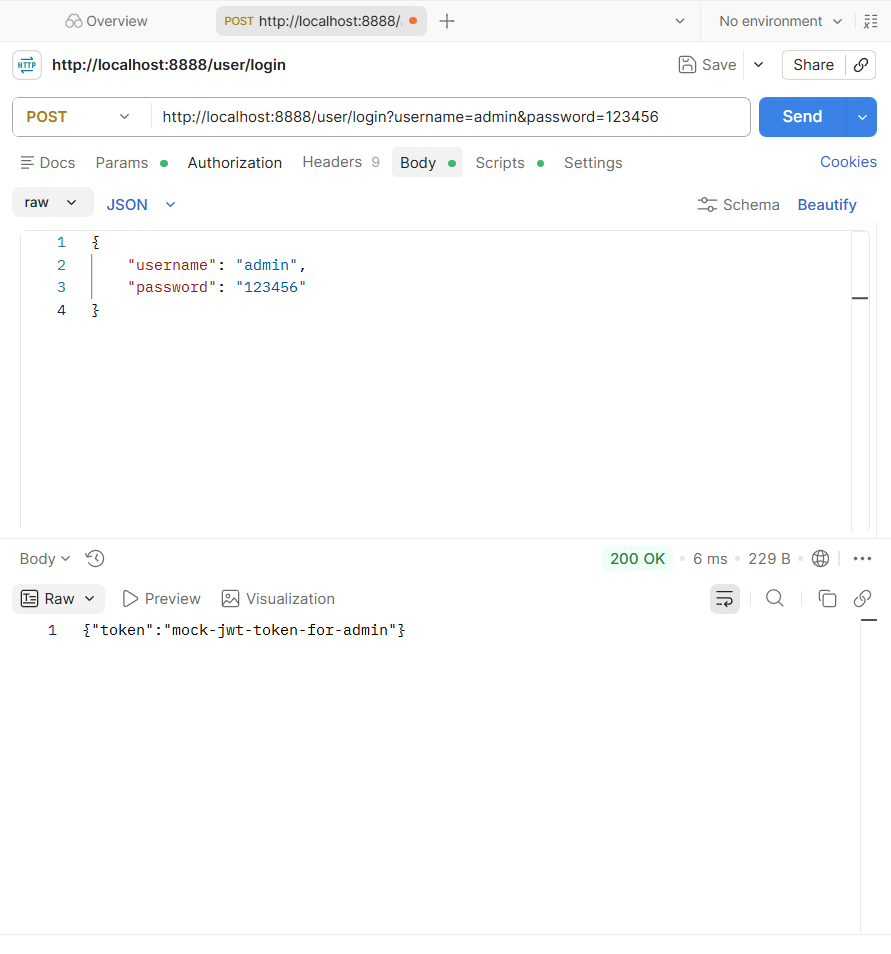
使用go run user.go运行,并通过测试工具测试
在postman中填入raw json,发送后可以收到200 OK,并读到我们的token
注意,标签是json时需要自己写raw json,而不是填query参数
RPC服务
创建项目
1
2
3
| goctl rpc new user
cd user
go mod tidy
|
生成服务骨架如下:
1
2
3
4
5
6
7
8
9
10
11
12
13
14
| user/
├── etc/
│ └── user.yaml
├── internal/
│ ├── config/config.go
│ ├── logic/
│ │ └── getuserlogic.go # ← 在这里实现
│ ├── server/userserver.go # gRPC 服务端适配器
│ └── svc/servicecontext.go
├── user/
│ └── user.pb.go # 生成的 protobuf 类型
│ └── user_grpc.pb.go # 生成的 gRPC 桩代码
├── user.go # 主入口
└── user.proto # 源定义
|
并且会自动生成protobuf文件
1
2
3
4
5
6
7
8
9
10
11
12
13
14
15
16
| syntax = "proto3";
package user;
option go_package="./user";
message Request {
string ping = 1;
}
message Response {
string pong = 1;
}
service User {
rpc Ping(Request) returns(Response);
}
|
若protobuf变更后重新生成,使用
1
2
3
4
| goctl rpc protoc user.proto \
--go_out=./user \
--go-grpc_out=./user \
--zrpc_out=.
|
实现逻辑
编辑internal/logic文件夹下的文件实现逻辑
1
2
3
4
5
6
| func (l *GetUserLogic) GetUser(in *user.GetUserRequest) (*user.GetUserResponse, error) {
return &user.GetUserResponse{
Id: in.Id,
Name: "alice",
}, nil
}
|
配置运行
配置文件位于etc/user.yaml,可以看到rpc服务名称、监听端口等
1
2
| Name: user.rpc
ListenOn: 0.0.0.0:8080
|
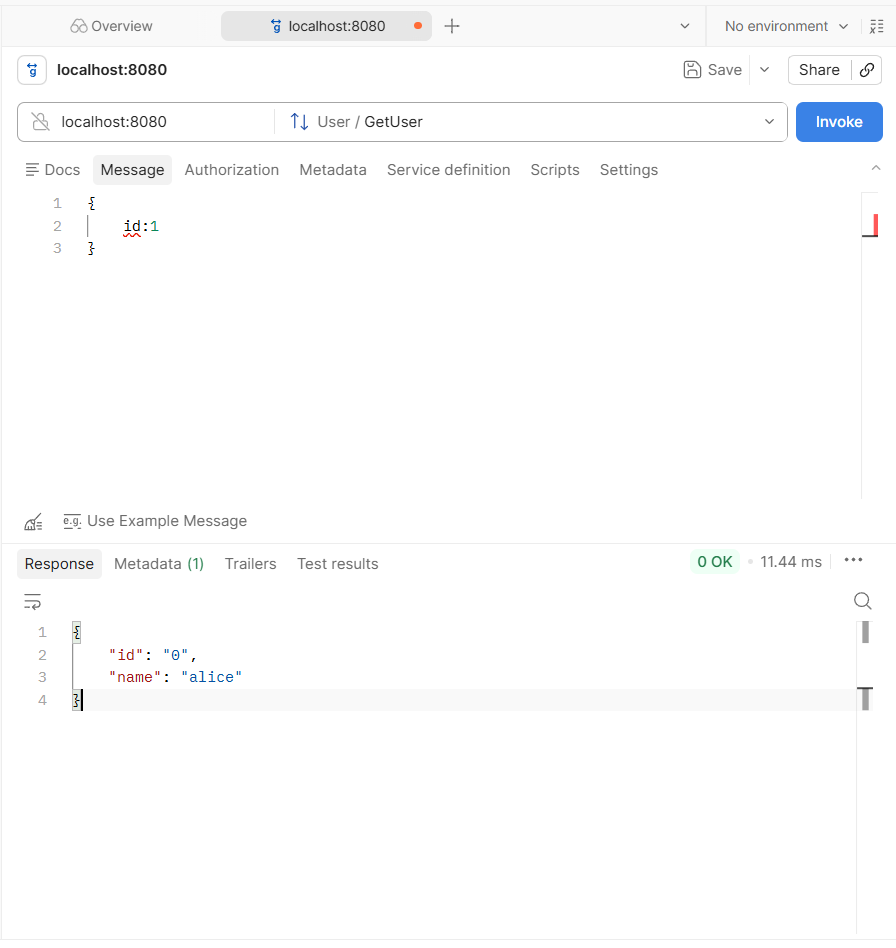
使用go run user.go 运行,通过接口测试工具测试
从api服务中调用
使用以下指令生成api网关使用的RPC客户端桩代码
1
2
3
4
| goctl rpc protoc user.proto \
--go_out=./user \
--go-grpc_out=./user \
--zrpc_out=./client
|
然后在servicecontext.go中导入client包
1
2
3
4
| type ServiceContext struct {
Config config.Config
UserRpc userclient.User
}
|
这样就可以在业务逻辑中像调用本地方法一样发起rpc调用
1
| resp, err := l.svcCtx.UserRpc.GetUser(l.ctx, &user.GetUserRequest{Id: 1})
|
且可以自动处理连接池、负载均衡和熔断